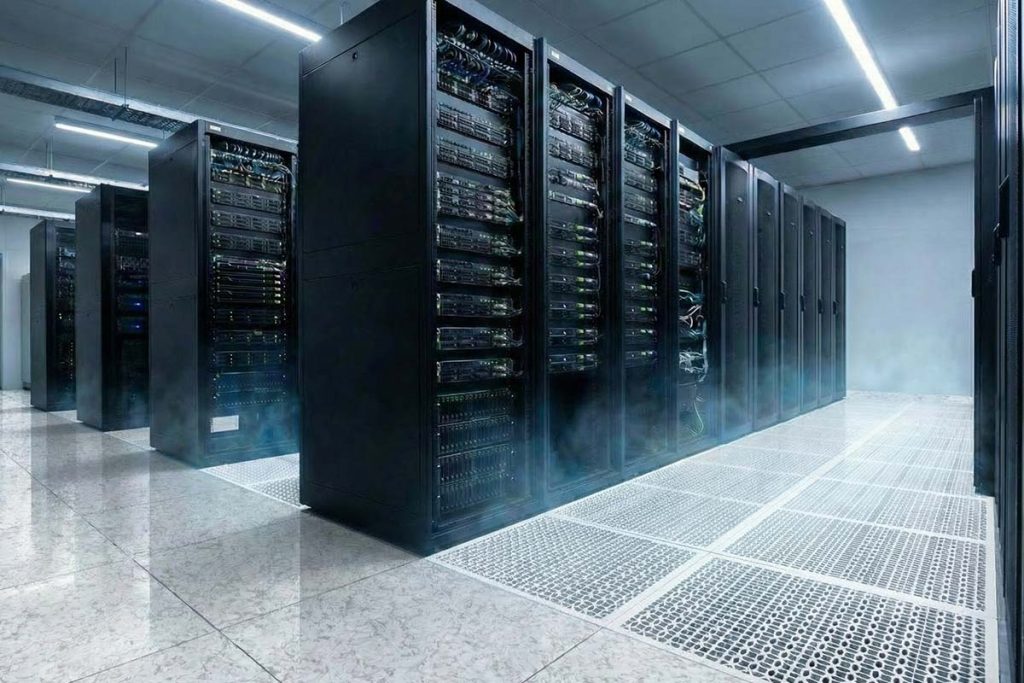
Where Should You Mount Safety Stripe Raised Floor Tile Puller Holder in Data Center?

The ideal location for installing a wall mount safety stripe raised floor tile puller holder in a data center should consider both accessibility and safety. Here are some factors to guide the placement:

  1. Near Main Aisles or Entrances: Install the holder near the main aisles or entrances of the raised floor area. This ensures that personnel can quickly grab the tool when needed.
  2. Close to High-Maintenance Zones: Place it near areas where floor tiles are frequently removed for maintenance (e.g., near server racks, cooling systems, or under-floor cable management points). This reduces the time to access the tool.
  3. At Eye-Level or Waist-Level: Mount the holder at a height that is easily accessible for most staff, typically eye-level or waist-height. This ensures it’s visible and within easy reach.
  4. Near Emergency Tools: If your data center has a designated area for safety equipment like fire extinguishers, first-aid kits, or emergency exits, installing the tile puller holder nearby ensures all critical tools are in a familiar, easy-to-find location.
  5. Avoid Obstructed Areas: Do not place the holder in tight or crowded spaces where it could be blocked by equipment or cables, making it harder to access.

We have a wide variety of wall mount floor tile puller holders to fit any budget. The following products are recommended:

Wall Mount Metal Safety Stripe Double Cup – $27.99
Premium All-Vac Horizontal Red Stripe Floor Tile Puller Holder – $55.99
Premium All-Vac Vertical Red Stripe Floor Tile Puller Holder – $57.99
Premium Carpeted Red Stripe Floor Tile Puller Holder – $58.99
All-Vac Plastic Wall Mounted Floor Tile Puller Holder – $36.99
Wall Mount Floor Tile Puller Complete Kit (Double Cup, perf puller and wall mount included) – $69.99

By ensuring the holder is both visible and accessible, you can enhance both the efficiency and safety of your data center operations.

WB-Redstripe-VL All-Vac red striped metal wall bracket, mounts vertically


read more
DCFTWhere Should You Mount Safety Stripe Raised Floor Tile Puller Holder in Data Center?

What Is a Refurbished Raised Floor Panel? And are they as good as new?

What is the process of refurbishing raised floor panels?

A refurbished raised floor panel is a used floor panel that has been cleaned and stripped of its old floor covering which is typically high pressure laminate. The remaining adhesive is cleaned from the surface. The panel is then laminated with a brand new piece of High Pressure Laminate. It comes off the line and is the stacked and banded for shipment.

Is a refurbished panel as good as new?

In the end , the panel has the appearance of a brand new HPL covered panel. In terms of life span, you can assume its service as any brand new panel would. That’s with the understanding that the panel has not been abused by overloading or surface marring.

Is it common practice to install these panel systems?

A refurbished raised floor panel is very popular for a couple of reasons.

  1. First, they offer a significant cost savings versus new.
  2. Second, the existing panel gets repurposed thus becoming a green energy credit.
  3. Third, in todays market, raw materials such as steel, which is the basis of the material used in a panel, have long lead times.

In addition to that, the floor market is very robust. Thus, lead times for new flooring is typically running 14-16 weeks. The lead time on refurbished panels is currently 5-6 weeks ARO.

Refurbished Data Center Floor Tiles


Should you install a new or refurbished system in your data center?

In the end, the choice between a new manufactured system and a refurbished system will come down to budget constraints and/or the desire to incorporate green practices. A refurbished system will be significantly cheaper vs. new.

Datacenterfloortiles.com is a top supplier of new, refurbished and used data center access floor tiles and infrastructure equipment. Contact Us today for a quick quote for your floor design project.

read more
DCFTWhat Is a Refurbished Raised Floor Panel? And are they as good as new?

Aluminum Raised Flooring For Semiconductor Fabrication & Cleanrooms

At Data Center Floor Tiles, we’ve recently seen a major uptick in the demand for aluminum raised flooring panel options for data centers, cleanrooms and manufacturing environments. Raised access floor manufacturers believe the demand for elevated aluminum access floor panels will continue to rise in 2023 and beyond.

Why is the demand for raised aluminum flooring increasing?

The most likely scenario taking place is the increased demand in semiconductor device fabrication in the US domestic market. Fabrication includes the manufacturing of chips such as computer processors, microcontrollers and memory chips. Previously, major industry chip manufacturers relied heavily on China and Asian countries to produce their integrated circuit (IC) computer chips in overseas plants. The process typically being the manufacturing and then shipping stateside of the products to the domestic consumer. A variety of aluminum raised floor factors make this ever increasingly difficult. Chip manufacturers and technology companies are receiving heavy pressure via political and US government policy changes to reduce foreign dependence on chip manufacturing. In addition, sanctions and taxes have put further pressure on manufacturers bringing fabrication plants and chip production stateside. The result is domestic companies and manufacturers are now scrambling to create production facilities to accommodate the high-tech demands of chip production.

Computer Mirco Chip Manufacturing Technology cleanroom using raised aluminum flooring

What makes raised aluminum flooring ideal for micro chip manufacturing plants?

The load capacity strength, lightweight anti static floor nature and particularly the magnetic properties associated with aluminum access floors makes it the perfect easy to install raised access flooring option for the production of computer chips. Often times manufacturing facilities have tremendous load requirements. A woodcore floor panel is suitable for standard office applications. However, woodcore does not meet the weight requirements and demands of a semiconductor production plant facility. Additionally, the nature of woodcore being a fibrous wood-based material makes it a poor candidate because of fire requirements in manufacturing facilities.

With woodcore floor panels being unsuitable for semiconductor fabrication plants, the next obvious choice is steel and cement filled access floor. A steel panel certainly meets the load and fire requirements for manufacturing. However, the heavily specified computer micro chip manufacturing facility requires extreme caution when it comes to magnetic properties of building materials. A steel floor panel unfortunately has the ability to conduct magnetic attraction. Paramagnetic materials required in chip manufacturing makes steel panels a poor candidate for chip fabrication.

The best choice for raised floor in a computer chip manufacturing facility is high quality aluminum raised flooring. Aluminum raised access floor panels are extremely strong, with the ability to meet and exceed loads offered by steel and concrete filled panels. Aluminum also under normal circumstances is not magnetic, mainly because of the crystal structure. The result is the most effective flooring solution to prevent contamination and defects in the high demanding manufacturing and clean room environment.

Semiconductor Production Fab Cleanroom raised access floors with aluminum flooring panels


Obtaining aluminum raised floor panel system

The large uptick in demand for aluminum raised floor systems is causing the domestic access flooring panel industry to re-evaluate their product lines. In the past, the demand for aluminum flooring in the domestic market has been light. As a result, many manufacturers shut down their aluminum raised flooring production lines and facilities because of lack of demand. Currently, there is an increased demand in the domestic market. However, this demand leaves few product options for building construction managers and general contractors to choose from. Most of the large domestic aluminum raised floor manufacturers stopped producing US manufactured product around 20 years ago. With die cast aluminum demand at an all-time high and square foot and square meters inventory nearly non-existent, contractors and companies in need have found few options for fulfillment.

Previously, when US demand was low, the need for aluminum floor tile panels in Asian microchip production skyrocketed. The result of past demand is currently most aluminum floor manufacturers are located in China. In the current market this presents a problem. Because of policies set over the past two years, importing Chinese product is now ever increasingly difficult and is also cost-prohibitive. Additionally, many US based companies are being called on to use domestic products vs. imported asian materials.

Fortunately, at Data Center Floor Tiles, there are a variety of solutions to fulfill the demand for aluminum raised floor tiles. Our creative solutions, include a large stock of tile types including refurbished aluminum floor tiles. We source refurbished tiles from facilities no longer in need of their aluminum products. Data Center Floor Tiles has the ability to take in, store and inspect the stock. We then refurbish the floor tiles with new HPL (High Pressure Laminate). The result is essentially new aluminum floor tiles available immediately to install in your access floor systems. We also offer new solid aluminum floor tile solutions and high flow perforated aluminum tiles.

How to purchase aluminum raised floor tiles

The experts at Data Center Floor Tiles are here to support your raised aluminum flooring needs. Our sales team is ready to source your replacement tiles and offer the best solution for your specific project. Contact us now for panel inventory questions and support.


read more
DCFTAluminum Raised Flooring For Semiconductor Fabrication & Cleanrooms

Used Raised Floor Tiles

What happens when your data center or office building needs to replace damaged or discontinued floor tiles? Used raised floor tiles, replacement floor tiles or refurbished panels will need to be sourced.

How to find used raised floor tiles

The company Data Center Floor Tiles keeps on-hand warehoused inventory of used and replacement flooring for circumstances where it is needed. Our replacement raised floor tiles consist of excess inventory left over from project installations, used floor panels removed from new installations and recycled panels tagged for refurbishment. The usage of recycled product is a highly cost effective way to replace damaged or worn out panels in your elevated access floor system.

Are recycled replacement panels safe?

It is critical for previously installed products to be inspected and dismantled using the highest level of care possible. If the HPL layer contains any imperfections, the replacement panel must be disposed or set aside for refurbishment. After passing inspection the panel will be cleaned and repackaged for safe storage and shipping. Often times the finished product is mistaken for new at a fraction of the cost.

Construction worker removing used raised floor tiles

Panel refurbishment process

For replacement panels that we identify as structurally sound but needing to be resurfaced, the refurbishment process begins by removing the edge trim and HPL surface. The damaged HPL finish and the factory edge trim are inspected along with the base layer. Furthermore, base layer tiles that pass inspection are eligible for refurbishment. Nonetheless, only after confirming the structural integrity of the base layer is a panel be certified as eligible. Refurbishment includes applying a new HPL top finish attached with new high-strength and variable temperature adhesive glue. To solve edge trim, we add new edge trim pieces to the HPL. Designing the edge trim itself into the HPL is also an option. The clients desired configuration determine if the edge trim is separate or built into the HPL layer.

Is used raised flooring a good value?

Used raised flooring is a tremendous value compared to new stock from manufacturers. Additionally, used, recycled, replacement and refurbished panels offer all of the same benefits of a new system at heavily discounted price. Moreover, no matter if the flooring system space is for needed for simple utility or a showcase system for a state of the art facility, used raised access flooring is a solution worth considering. Compatible with all aisle containment door frames.

Used raised floor tiles installed in a new data center

How to purchase used raised floor tiles

The experts at Data Center Floor Tiles are here to support your raised flooring needs. Our sales team sources your replacement tiles and provides the best solution for your specific project. Contact us now for inventory questions and support.


read more
DCFTUsed Raised Floor Tiles

Raised Access Floor Installation

Recommended Equipment and Tools

It is the responsibility of the Installation Contractor and their crews to protect the installed product until the installed area or section is turned over to the General Contractor, Owner or Owner’s representative. For raised access floor installation, exercise caution and good judgment when transporting and working with tools, tool cribs, gang boxes, pallet jacks, portable saws and band saws, or any other equipment on top of the raised floor. 

Other trades are also to be cautioned as to acceptable work practices on top of the access floor. Continuous sheets of 4’ x 8’ plywood with a minimum ½” thickness are recommended to protect the floor from all trade work and construction traffic conditions and to cover floor openings such as where floor box access tiles are installed. 

Access Floor Installation Tools & EquipmentRecommended Power Tools and Equipment (number of each): 

  • (1) Torque Adjustable Power Drill, 3/8” chuck 
  • (1) Adjustable Power Drill, ½” chuck 
  • (1) Builder’s transit or laser level (Spectra Precision 1485 HP or equal) 
  • (1) 20-inch wide pallet jack 
  • (2) 50-foot extension cords 
  • (2) 100-foot extension cords 
  • (1) 14” throat, metal cutting band saw, 450ft per minute cutting speed 
  • (6) Band saw blades, bi-metal cutting, 14 tpi, wavy set ½” wide, 0.030 thick 
  • (1) Suction Cup Lifter 
  • (1) Industrial grade vacuum cleaner with fittings 

Site Preparation

The efficient raised access floor installation requires control of the area where the work is to be undertaken. It also requires that the General Contractor, Owner or Owner’s representative be aware of and understands the following conditions. 

1. Storage Conditions:

  • a. Before installation commences, material must be unloaded and staged as close as possible to the actual installation area. The General Contractor, Owner or Owner’s representative must provide a closed, dry and secure storage area. This area must be accessible to freight elevators and/or hoists and have a clear path to the installation area(s).
  • b. The storage area must be closed to the outside weather with a minimum temperature of not less than 40° F and not more than 95° F (4° C to 35° C) with a relative humidity level between 20% min. to 80% max. maintained at all times, as the access floor and its accessories are an architectural interior finish and not a base building structural component. 

2. Site and Temperature Conditions:

  • a. The installation area(s) must be closed to the outside weather conditions with a working temperature between 50° F to 85° F and a relative humidity (RH) between 20% and 60% for at least three (3) days prior to, during and after the entire installation period.
  • b. Material taken from the secure storage area must be staged in this environment before being installed. It is recommended that the installation area be as close to the normal operating RH and room ambient temperature as possible, so as to acclimatize the components prior to assembly and placement.
  • c. Adequate space lighting and a minimum 110-volt, 20-amp supply power must be made available during the installation.

3. Substrate Conditions and Acceptance:

  • a. The subfloor must be clean and free of moisture, dirt, grease, oil or other debris that would hinder placement of the pedestals on the substrate.
  • b. Check for final level of the substrate. Levelness is defined as the degree that the floor varies or slopes from true plane over the length of the area. 
  • c. Check for final flatness of the substrate. Flatness is defined as how smooth the surface is over a true plane, using a 2-foot straightedge per ACI 301 Tolerance Class C. Site inspection of the subfloor areas with a straightedge and pedestal can easily determine problem sections. 
  • d. All low areas (chipping, spalling, curvature, valleys, etc.) must be filled and sealed with a high quality floor patch, if the conflict with the pedestal grid layout. 
  • e. High spots (exposed aggregate, curvature, hills, etc.) must also be repaired with a floor patch or self-leveling, Portland-based cement. If the concrete substrate has been leveled, bull floated and final floated, but not trowelled or broom-finished, it may be possible to spot grind the applicable area to and acceptable flatness. 

4. Other Substrate Materials:

  • a. If applicable, check wood subfloors for any excessive deflection that will transfer to the access floor tile surface and seem spongy under floor or castor traffic. Wood subfloors, unless braced or strengthened, also tend to creak and generate noise.
  • b. If applicable, existing subfloors with floor finishes such as vinyl composite tile (VCT) should be examined for adhesion to the substrate and re-installed if loose, or replaced, if damaged. A suitable floor patch can be used in lieu of VCT tiles.
  • c. If applicable, Vinyl Asbestos tiles (VAT) and the tile adhesive with asbestos fibers must be removed, repaired and/or sealed by others qualified to conduct the asbestos abatement program within the project’s jurisdiction, before the access floor installation commences. The Access Floor Installation Contractor shall receive written confirmation that the area is sage to work in and inhabit. Follow the recommendations of the asbestos abatement program guidelines if a mechanical anchor is being specified, as there may be asbestos dust from drilling anchor holes.

5. Contract and Shop Drawings:

  • a. Check the size and configuration of the floor area to the contract drawings and mark all measurements on the drawings accordingly. Review and obtain agreement from the General Contractor, Owner or Owner’s representative concerning size, trade or architectural obstacles or changes in space configuration.
  • b. Confirm that the access floor starting point is in agreement. Refer to the section on Installation to properly establish room squareness.

6. Installation Access and Architectural Elements:

  • a. Ensure that the access floor installation, as scheduled, will be free of other trades and that their material are, or will be, cleared form the installation area(s).
  • b. Locate and mark all distribution service elements (power, voice, data, plumbing, perimeter HVAC wall mounted convection units, etc.) that may conflict with the pedestal grid locations. Reach an agreement with the other appropriate trades on how to handle any such obstructions and determine the schedule to correct these conflicts.
  • c. All overhead work is to be completed prior to the installation of the access floor.
  • d. Any subsequent work which will use the access floor as working platform much protect the access floor with suitable load bearing protective materials, whether or not that section or area of access floor installation has been accepted.

7. Access to Completed Areas:

– Notify the General Contractor, Owner or the Owner’s representative (those responsible) that no trade personnel other than certified access floor installation mechanics shall be allowed on the completed section(s) until:

  • a. The perimeter of the section is enclosed on at least 3 sides by permanent floor to ceiling walls or other such permanent architectural elements to prevent shifting of the access floor grid lines.
  • b. The access floor, or portion thereof, has been inspected and accepted by the General Contractor, Owner, or Owner’s representative and so recorded.
  • c. All trades working on top of the completed access floor installation protect the surfaces by placing down continuous sheets of 4’ x 8’ plywood, or other suitable load bearing material, with a minimum thickness of ½. 

8. Cleanliness of Access Floor and Cavity Spaces:

– The access floor and cavity space will be clear of dirt, dust and debris upon completion of each area and as accepted by the General Contractor, Owner or Owner’s representative. 


Raised Access Floor Installation Methods and Techniques

Getting Started With Your Raised Access Floor Installation

Step 1 – Verify Dimensions and check subfloor:

  1. 1.1 Check the room or area dimensions to the approved contract drawings.
  2. 1.2 Check the level of the subfloor with a laser level or builder’s transit. Check variations to established architectural reference points where the access floor will abut or terminate, such as doorways, sills, recessed concrete slab edges, columns, elevator shaft(s) or some other permanent interior architectural building element. Notify the General Contractor, Owner or the Owner’s representative (those responsible) if the access floor cannot be installed per the contract drawings.
  3. 1.3 Check the subfloor flatness. Do not proceed with any aspect of the installation until irregularities have been corrected.
  4. 1.4 Consider cable management floor options for the subfloor plenum area

NOTE: Starting the installation before corrective actions by others are satisfactorily completed may automatically indicate acceptance of the subfloor “as is” and the overall responsibility to correct the substandard conditions. 

Starting Point for Raised Floor InstallationStep 2 – Establish the “STARTING POINT”:

  • 2.1. Locate and mark the starting point ( ) indicated on the contract drawings.
  • 2.2. From the starting point, snap chalk line “A” along wall no. 1 (longest wall) at 24” from the wall.
  • 2.3. From the same starting point, snap a temporary trial chalk line “B” along wall no. 2 (shortest wall).
  • 2.4. Make continuous measurement checks of the distance from the wall for both chalk lines.
  • 2.5. If the distance exceeds 24”, due to irregularities in the face of the wall, move the line closer to the wall to make sure the maximum distance does not exceed 24”. “ 


Step 3 – Establish a square condition (90⁰ angle) for control chalk lines.

  • 3.1. The following steps will assure that the raised access floor installation will be square relative to the room. The access floor gridlines must be squared by the installer, using the “3-4-5” method of triangulation.
  • 3.2. From the starting point, choose the longer wall and measure the longest possible distance along chalk line “A” to establish the first side of a “3-4-5” triangle and mark this location as “Point 1”.
  • 3.3. From the same starting point, choose the shorter wall, adjacent to the first wall and measure a distance along chalk line “B” that will be appropriate to establish the second side of a “3-4-5” triangle and mark this location as “Point 2”.

Placing Supports Floor Tile InstallationStep 4 – Place Supports:

  • 4.1. In both directions, measure ten-foot grid increments from the starting point and snap chalk lines perpendicular to each control line. This creates the outline of the pedestal grid and the points of intersection at 10’ on center (o.c.).
  • 4.2. Place all intersecting grid line pedestals in their approximate position. 
  • 4.3. Within the initial 10’ x 10’ grid lines, lay out and mark the locations of the:


  • a. Architectural and Power components.
  • b. Zoned Cabling components.
  • c. Bridge Beam supports being secured to the substrate.

These locations will be indicated on the contract drawings and should be referenced from permanent architectural elements such as columns. 

  • 4.4. Using a laser level or builder’s transit, shoot the pedestals to the proper elevation at each of the grid line intersections.
  • 4.5. The 10-foot leveling bar will span these leveled control pedestals and is used to set the infill pedestals on 24” centers between these grid points. Set the four-(4) infill pedestals at 24” centers under the leveling bar and adjust each pedestal head up to the bottom of the leveling bar. Do not raise or knock the leveling bar as you install the infill pedestals between the control pedestals.
  • 4.6. After two (2) grid line rows at 10-feet apart have been placed, turn the leveling bar 90 degrees to position the infill pedestals between these control rows. You will repeat this raised access floor installation pedestal sequence for each 10’ x 10’ grid as you complete the “Basic L”. 
  • 4.7. Glue each freestanding pedestal base that has been set in place and leveled. Use an adhesive spatula or similar device to place the adhesive onto the subfloor.

A pedestal assembly, firmly attached to the structural substrate (concrete slab, floor, structural steel bridging), shall be located under each panel corner, whether full module panels, or modified/cut panels at perimeter walls, columns, equipment, etc.

Tilt the pedestal to 30 to 45 degrees and be sure to keep one pedestal base side on the substrate. This tilt method helps ensure that the grid spacing of 24” O.C. is not disturbed as the adhesive is applied.

Use a slight hand pressure and twist to embed the pedestal into the adhesive. The adhesive should flow out and show a slight bead on at least three sides of the pedestal.

This bead of adhesive will be from 1/16” to about 1/8” in size. This method ensures full adhesive spread over the bottom of the baseplate. 

Pedestal Adhesive Open Times:

The pedestal adhesives will start to setup and cure once they are applied. The actual cure rates will vary with the room ambient temperature, the substrate temperature, the concrete moisture content, concrete sealer application and the relative humidity of the space. The period of open time of the adhesive in which the pedestal bases can be moved for minor grid or levelness adjustments and then reseated into the wet adhesive will also vary depending upon whether or not the compound requires a solvent release or moisture cure reaction. A solvent release requires evaporation of its solvent to cure therefore excessive moisture conditions slows the cure rates. A moisture cure compound is the opposite reaction in that excessive moisture conditions will speed up cure rates and reduce the open time available for minor adjustments.

At 72 degrees F and 40 to 45% RH, the following open times are typical:

Aim 382 Adhesive, solvent (water) release 40 to 50 minutes.

Michigan Adhesives, Sealbond #95, moisture cure 20 to 30 minutes.

Moving the pedestals for adjustments after the open time has expired may require additional amounts of adhesive to reseat and bond the pedestal base.

Always be aware of the open times of the specified adhesive to the actual site conditions. 

  • 4.8. Pedestal Adhesive and Mechanical Anchors:

Always use pedestal adhesive where mechanical anchors are specified for seismic conditions or other requirements such as lateral braces. The adhesive affords the raised access floor installation installer the opportunity to hold the grid in place, make minor adjustments as the installation progresses and compensate for subfloor undulations. 

Allow the adhesive to set for at least 48 hours from the time of last pedestal placement in the room or area before installing anchors. The set-up period allows the baseplate and adhesive to cure, conform to the substrate undulations and act as a gasket as the mechanical anchors are tightened.

On every other row, remove up to five (5) panels at a time to access the bases. Drill holes as per the specified manufacturer’s instructions and be sure to use the proper bit OD to anchor OD and hole depth. The anchors will be placed on two (2) opposite sides of the pedestal base tube to prevent concrete failure. Cut pedestal based due to infill or obstruction conditions must maintain the minimum anchor spacing as recommended by the manufacturer unless instructed by others to treat these conditions differently. 

Secure the anchors to the manufacture’s recommended torque. Alternate fastening between two anchors until the torque setting is achieved. Use caution so as not to shift or pull the pedestal grid alignment and vertical plumb of the pedestals themselves. 

  • 4.9. Stringer Applications:

Attach stringers to the leveled pedestal head with a torque controlled screw gun. Set torque to 40 inch-pounds. Do not over fasten the stringer screws. This can cause the bottom of the stringer to flare outward and can make the system tight as panels are placed into the stringer grid.

Stringers must be squared to the pedestal head. If the stringers are skewed or cocked at the time of installation to the pedestal head, the stringers will be out of square to the pedestal grid and you will not be able to maintain the visible panel grid lines on the walking surface of the access floor installation.

Install the stringer grid pattern as specified using 2’ and/or 4’ stringers. Be sure to attach cut end of stringer to pedestal head using self-drilling/threading screw from below. 

Stringers which are field cut at perimeter walls, columns, equipment frames etc. where the screw hole portion has been cut away, shall be positively attached to the perimeter pedestal head by either re-drilling a stringer screw hole and attaching accordingly, or using an appropriate sized self-tapping metal screw. 

  • 4.10. Setting Panels and Creating the Basic “L”:

Once the first 10’ x 10’ grid has been installed, leveled and checked for squareness, install the three (3) adjacent infill panels against the wall in order to secure the grid. Cut the infill panels 1/8” short of the actual dimension to allow for building expansion and contraction. This 1/8” void will be covered by a cove base to be installed by others. At this point the pedestal adhesive will not have achieved its full bond strength, so it is necessary to place wood shims in the void to prevent shifting. Remove these shims after 48 hours. 

  • 4.11. The remaining 100 square foot grid sections are installed and sequenced in an “L” configuration within the room or space. The “L” simulates a 90° carpenter’s square and is used to maintain square of the entire field relative to the initial control lines as installation of subsequent grids progresses.
  • 4.12. From the Starting Point and along the longest wall, place the tiles within the next adjacent 10’ x 10’ support pedestal grid area. Make sure the tile edges along the wall stay reasonably aligned on the control line. This would be Section B 2 in the diagram. 
  • 4.13. Create the long section of the “L” first. Continue to install grids and ensure that the “L” is maintained as installation progresses. 
  • 4.14. Stockpiles of pallets or skids containing the access floor panels should be staged within 10’ of the grid areas and no closer than 10’ apart, in both directions, to ensure that the structural subfloor is not overloaded. Check with those responsible that the pallet weight and the dead weight of other packaged components are within the concentrated and uniform load capabilities of the building slab or floor.

NOTE: Always exercise caution when moving or handling stacked panels to prevent slipping or toppling.

  • 4.15. Raised Access Floor Installation Mechanics and their helpers should always be mindful of installation efficiencies in terms of placing pedestal and panel stocks ahead of actual tile placement and within reach of the installer.
  • 4.16.a. Control Tile Grid Lines Between 100 Square Foot (10’ x 10’) Sections:
  • a. From one (1) to three (3) rows out from the starting point, attach a dry line, in both directions, across the walking surface of the panels directly over the edge seam of two abutting panels. 
  • 4.16.b. Raise the dry line above the panel surface by placing a pedestal on the walking surface.
  • 4.16.c. Run the dry line and attach the ends to columns or the drywall surface of permanent walls with #10 sheet metal screws. Make sure the dry line is taunt and support with more pedestals as necessary along the dry line to provide intermediate support. 
  • 4.16.d. These dry lines will be continuous and moved along each 100 square foot section of grid as installation commences. These visual controls will prevent the “L” as described in Step 4.10 from drifting off the snapped chalk lines on the substrate.

Other Special Conditions

Partition Walls:

  • 1. Fire-Rated walls must be continuous to the base building structural floor and are not to be installed on the access floor. 
  • 2. Demountable partitions and fixed stud wall construction can be installed on the floor. As with any type of raised floor, do not use powder activated fasteners to install the wall or partition base channel to the panels as the magnitude of the impact can permanently deform the tile surface. 
  • 3. Pre-drill base channel mounting holes and secure per the manufacturer’s instructions. It is recommended that blunt tip screw fasteners be used so as not to damage any cable runs that extend under the wall location.
  • 4. Partitions that are taller than 72” in height may be subject to seismic requirements. If applicable, check with those responsible before proceeding. 
  • Grounding of the Access Floor System: 

1. Electrical Ground Requirements: 

  • a.The Access Floor System can be connected to the building equipment ground subsystem. A grid network of equipment ground wire connections can be made to the pedestal based on the electrical specifications for this project. This equipment ground network is typically #6 AWG ground wires and should be installed by a licensed electrician. 
  • b. Under no circumstances shall the Raised Access Floor Installation Contractor assume responsibility for conducting this work unless a licensed electrician has been separately subcontracted for this specific purpose under the scope of the access floor installation work. 

2. Static Electrical Requirements:

(For Information Purposes Only)

Requirements for specific statical electrical properties involve the floor covering specified for the project and not the raised floor. 

Raised Access Floor Installation Punch List and Final Inspection:

1. Inspection: The Access Floor System must have a solid feel underfoot Replace or repair any damaged parts, accessories and defects in workmanship. Obtain building owner, agent or general contractor acceptance of the completed section before any loads are applied or subsequent trade work such as carpet commences.

2. Safety and Protections: The raised access floor installation system shall be protected from damage or work conducted by other trades until the final inspection has taken place. Plywood or other suitable load distribution material shall be laid in hallways, corridors or any material passageway entering the raised floor area. 

Always know your raised floor installation floor height, need for data cables, load rating and desired feet high. The feet high profile cable management determines floor height. The height profile floor determines easy access to understructure components. Tye type of access floor required is determined by a variety of raised flooring solutions. Raised floor panels are available now at DCFT.


* Guide is for reference only. Always contract a certified installer before attempting to install a flooring system. Refer to the ASM Raised Access Floor Installation Guide for additional drawings and details. See ASM PowerTraxx Installation video below for low-profile access floor installation.


read more
DCFTRaised Access Floor Installation

Data Center Cleaning Companies Service

Professional data center cleaning companies provide products and services that meet industry standards. In addition, meeting the requirements for cleanroom environments is important. Mission critical spaces require extreme care. The data processing equipment in a data center is extremely valuable. In order to avoid damaging costly servers and electronics, this equipment requires specific cleaning services & procedures. Our cleaning technicians receive training in surface cleaning techniques as well as subfloor (under floor) plenum cleaning. We subscribe to ASHRAE technical cleaning recommendations and procedures in order to ensure satisfactory results and keep your data center running. The data center cleaning products are lint-free, dry mop and have anti-static dissipative properties to remove particulates. Likewise the usage of water introduced in the facility is kept to a minimum in order to avoid dangerous spills.

What does a data center cleaning company do? 

  • Post construction cleaning
  • Subfloor underfloor plenum cleaning
  • Cleaning certification
  • Cleaning standards by ASHRAE
  • Air duct cleaning
  • Vacuum cleaning
  • Removal & cleaning of perforated floor tiles
  • Sensitive equipment server room cleaning
  • Cleanroom cleaning
  • Services to data centers
  • Provide quotes for data center cleaning costs
  • Computer room maintenance
  • Keep your data facilities clean
  • Collection of loose & forgotten parts
  • Leadership in Energy and Environmental Design’s (LEED) standards cleaning products & procedures compliance

Subfloor plenum data center cleaning companies


Data center cleaning services

It is important to use antistatic equipment and specialized cleaning solution supplies best practices when preparing and cleaning a data center. Our highly trained technicians use cleaning checklists to ensure your data center equipment is protected and that the data center operation is simultaneously reliable. Our cleaning supplies & service certainly meets and exceeds work environment cleaning certifications standards for raised floors.

Data Center Cleaning Company Technician

Cleaning of the Access Floor Plenum Space: 

Access floors used for supply or return air should follow the guidelines as established in NFPA-90A, Section B-5.2 which recommends that a newly installed access floor cavity be cleaned once a quarter after initial commission and then adjusted to the frequency as needed by the environment and the dirt build-up. The dirt collection basket supplied with underfloor air floor diffusers should be removed from inside the diffuser and cleaned on the same quarterly basis, and then adjusted to the environment. 

DCFT is unquestionably one of the elite cleaning and maintenance companies. Additionally, we provide regular cleaning services and products throughout the United States. If your data center environment requires regular maintenance cleaning or deep cleaning services, our services are available from New York across the entire country to California. Of course, don’t ignore the importance of sub-floor and surface cleaning in your data center. Accordingly, we have locations near you to provide technical data center cleaning services and cleaning equipment for all sized server rooms.

Data Center Cleaning Areas We Serve

DCFT offers data center cleaning services from coast to coast in the Contiguous lower 48 states of the United States of America. From California to New York, Florida to Montana, we have you covered.

Contact us now for a data center flooring cleaning quote.


read more
DCFTData Center Cleaning Companies Service

Access floor systems for data centers

The meaning of the word access floor is perfectly defined by the word “access” in the term access floor systems.

According to dictionary.com, “access” means the ability or permission to approach, enter, speak with, or use something.

This includes admittance. For example, they have access to the wires in the plenum space. Therefore, the purpose and meaning is to allow the end user the ability to access what is under the floor system.

By design, each individual panel is removable. In fact, this makes it possible to install HVAC, plumbing, or wiring in a floor solution design plenum space. Another key point being that all of this is possible without the need for cumbersome overhead cable systems.

Access floor systems for data centers, commercial and office environments

  • Efficiently rout power and easy access to data cabling
  • Create a healthier building design workspace with cleaner under floor air distribution
  • Compatible in pre-existing spaces with no current access floor
  • Increased flexibility to effectively change room layouts
  • Traditional raised floor provides acoustic benefits increase productivity and sound transmission to promote a quiet workspace
  • HPL surface (High Pressure Laminate) provides and easy to clean non-porous structure
  • HPL floors are antistatic and available in a variety of flooring finishes
  • Hollow steel options are tremendously strong for industrial applications
  • Carpeted floor tiles are easily replaceable if damaged
  • Low profile access floor provides easy gained access to the wires
  • Low profile flooring heights vary depending on floor to ceiling height
  • High profile cable and wiring management
  • Control underfloor air distribution system

Data Center with an Access Floor System


Top considerations when building a new system

You must consider items such as the subfloor and load ratings & bearing requirements when specifying your computer flooring system. With an access floor system, future maintenance, upgrades and repairs is a breeze. As a result, simply elevate this specific type of flooring tile to access the plenum space below. Cable management floor design in raised access flooring system.

Man standing on access floor removing a server from a data center rack

DCFT is chiefly an advanced raised flooring company. We supply replacement tiles, accessories, and consulting services for large and small scale environments.

Our companies goal is to help if you order from us or not. With this in mind, we will identify your current floor panels and system. It is especially important to recommend the best products to improve your environment. Furthermore, our company specializes in data centers, offices, warehouses and all commercial spaces that require a raised floor.

Our support team is on standby, ready to hear about your latest project. Above all, we will always provide the most competitive quote possible to earn your business.


read more
DCFTAccess floor systems for data centers

How to choose the best access flooring system for your data center

When it comes to an access flooring system, there are many different brand and materials choices. Firstly, the data center construction engineer must specify the load ratings the raised access flooring system requires. Typically, for the US floor industry, standard spec is 24 inches square. Some European sizes include 24 x 48 inches.  Furthermore, experts establish if a high air-flow system integration is needed for air distribution. Generally, environments that require equipment to be cooled benefit from the inclusion of a sub-floor based HVAC system. Sites that require extensive cable management need to decide if cabling will run in the ceiling or in the sub floor. Flooring finishes vary a wide range from high pressure laminate, to carpet or bare exposed floor. High flow floor tiles are another factor that factors into the capability of the access computer flooring system. Finally, when all of these decisions have been specified, by all means a computer flooring system can be specified.

System Applications:

  • Office buildings
  • Casinos
  • Data centers
  • Computer rooms
  • Server rooms
  • Medical facilities
  • Schools
  • Industrial applications sites
  • Airports
  • Security buildings
  • Control rooms
  • Telecommunications facilities
  • Power and Data rooms

Woman expert access flooring system


How much does a system cost?

Pricing for raised access floor tiles start from $30 for a cost effective solid woodcore tile. By comparison, clearview floor tiles provide easy access viewing of cabling and wiring. Prices range up to $1,000. Hollow steel floor panels provide superior weight handling at a fair cost. Occasionally required is a type of flooring niche product referred to as low profile access floor. Generally the requirements of the system will dictate the budget.

Raised Access Floor Expert

Finally, choose a floor solution that meets and exceeds your current requirements. Electrical wiring, underfloor air distribution ufad and finished height access flooring are all factors. Lastly, we’ve never had a customer regret building an advanced access flooring system with capable years to come. However, we have had customers reach out to us after the’ve outgrown their current floor system. The experts at DCFT are ready to guide you through choosing the correct system to meet your facilities needs. Contact Us for a quote today.


read more
DCFTHow to choose the best access flooring system for your data center

What is a raised floor system?

A raised floor system is the use of post (steel pedestal base), stringers, and panels in the building of a data center or office building requiring the floor to be higher above the existing subfloor. Furthermore, HVAC systems (Air conditioning) conditioned air require raised floors in the plenum space. In fact, the system delivers cool air to electronic equipment in data centers or to people in office buildings. The installation occurs after laying the construction of a concrete slab foundation in the first place. Moreover, computer rooms require raised floor systems to hide & avoid running wires and cabling above floor surface. The use of floor grommets allow wires and cabling to rise through the subfloor via higher floor heights. Type of access computer flooring finishes are available in a wide range of materials. In conclusion, all floor panels are covered with carpet or durable high pressure laminate and are capable of handling robust weights and load ratings. Solid floor tiles cover vast areas while perforated panels deliver cool air to chosen hotspots. Types of solid flooring offered panel materials are typically hollow steel, filled steel or woodcore filled.

System applications

View under raised floor with pedestal base, stringer, panel and concrete slab.


Raised floor vs access floor. What’s the difference?

Raised floor and access floor are both terms for an elevated flooring system that sits above a solid concrete or slab foundation. These systems provide easy access to the subfloor and its components, which is crucial for maintaining efficient operations. In data centers, conditioned air can be distributed through these raised floors, improving airflow and cooling. The standard square foot measurements for access floor tiles are typically 24″x24″, and they can be easily lifted using double cup floor tile pullers or carpet floor tile pullers. Sometimes, users choose to cover the tiles with solid carpet, though it is best to avoid fully carpeted, permanent installations to ensure continuous access to the subfloor and its components. With modern floor tiles, any carpet can be glued to the tile surface, maintaining a seamless appearance. These high-quality tiles can last up to 50 years, making them a durable and long-term solution for data centers and other facilities.

Raised floor server rack aisle

Finally, choose a cost effective product that functions well and matches your environments requirements. Air distribution of a raised access flooring system is integrated using perforated computer flooring panels.  The experts at DCFT are ready to guide you through choosing the correct system to meet your facilities needs and your areas codes and standards requirements. Contact Us for a quote today.


read more
DCFTWhat is a raised floor system?

Data Center Spare Parts, Components and Accessories

Upon data center facility completion, availability of replacement, spare parts & components is a major concern for data center managers. Manufacturers of data center parts are nevertheless constantly updating their inventory for critical systems. Often times a new part design compatibility must specifically be confirmed for existing equipment. Above all, site downtime and loss of critical space is expensive. As a result, new old stock parts inventory are sourced and implemented into legacy data centers. Likewise DCFT warehouses many parts. Moreover, parts that aren’t are readily available are ordered directly through the manufacturer. Additionally, we recommend new parts based on existing compatibility and desired equipment updates. However, a successful redundancy strategy results in decreased on-site downtime for your critical facility.

Data center spare parts & infrastructure inventory management

Data Center spare parts equipment & maintenance strategy

The anatomy of a data center includes a combination of human operations and essential facility equipment

Managers and maintenance operators understand that 70% of data center outages is attributed to human error. While the remaining 30% includes equipment failure and other circumstances. Therefore, It is critical for maintenance managers to have a redundancy strategy for sourcing equipment and data center spare parts. While ideally equipment resides on-site, the feasibility of storing and tracking parts is a challenge. Most important is being able to quickly source parts for replacement. Altogether, critical facility operations managers and maintenance operators rely on DCFT to be a crucial source of support for equipment.

What is the best practices guide for build out?

  • Design and implementation planning
  • Avoid unplanned downtime
  • Operations & maintenance program (O&M)
  • High level of facility automation
  • Strive for software defined data center
  • Environmental health & safety
  • Emergency response strategy
  • Energy usage goals and strategy
  • Redundancy strategy
  • Use of a critical 3rd party equipment partner & provider

Finding Data Center Spare Parts

Finally, choosing a raised flooring system that matches your function requirements is a critical decision. The experts at DCFT are ready to guide you through choosing the correct system and provide the highest level data center accessories & data center spare parts to meet your facilities needs. Contact Us for a quote today.


read more
DCFTData Center Spare Parts, Components and Accessories